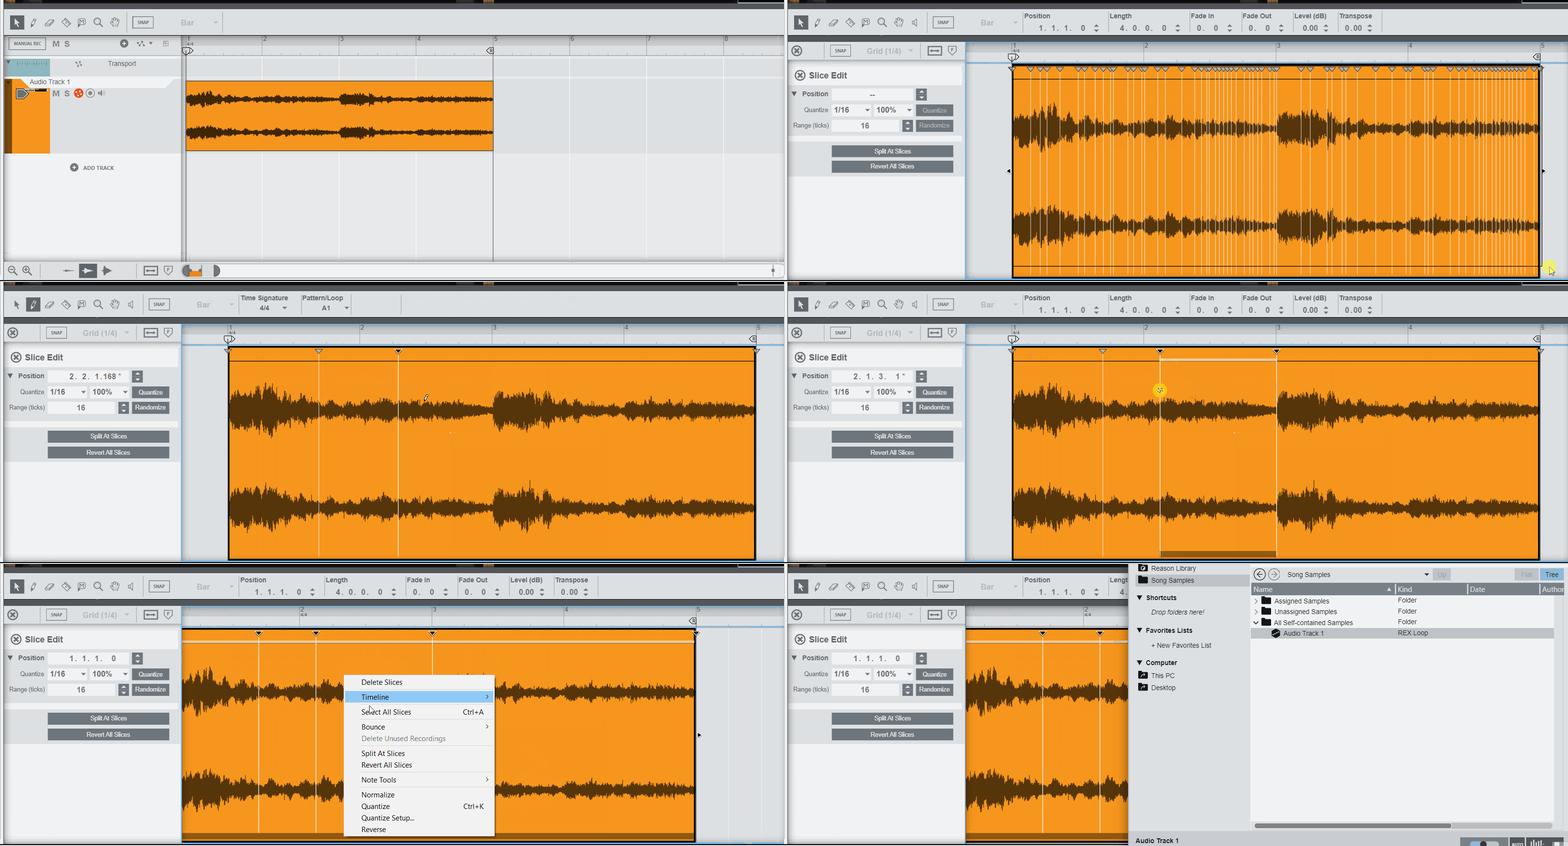
How to create REX loops in reason 13
Welcome to my no nonsense guide to creating REX loops in reason 13. I have added writen instructions and also created a gif demonstrating what I've written.
First open the audio file in slice edit mode by double clicking the audio clip and then click slice edit. Reason will automatically add slice markers. If there not where you want them to be then select them all and press delete or use the delete tool.
Creating slices
Press W to to select the pencil tool and click any part of the waveform to create slice markers.
Editing slices
If you need to move a slice marker press Q to get the selection tool and then hover over a marker while holding CTRL the icon will change and you can then left click and drag the marker to a new location.
Deleting slices
Press E to get the erase tool to remove them by either clicking the marker or click and drag a box over the markers you want to delete.
Preview slice regions
To preview slices you can either use the select tool and hold ALT over a slice region and then left click or you can press I to select the speaker tool and click inside the slice regions to hear the preview.
Exporting to REX file
Reason uses the audio track name so if you need to change the file name then change the audio track name BEFORE bouncing to a REX file.
Once your happy with where the markers are if you press CTRL + A to select all markers and then right click on the audio file then go to bounce -> bounce clip to REX loop.
Demonstration
Below is an example of adding and moving markers on an audio file, plus exporting it as a REX loop.
