Omnisphere 3 tutorial series - saving and loading presets
Learn how to save and load presets in this new tutorial series on Omnisphere 3!
One of my favourite synths recently got an update and so to help new people (and myself) I am going to write a series of tutorials that break it down into easy to digest chunks. Today we will cover the general layout and how to load and save presets.
General Layout
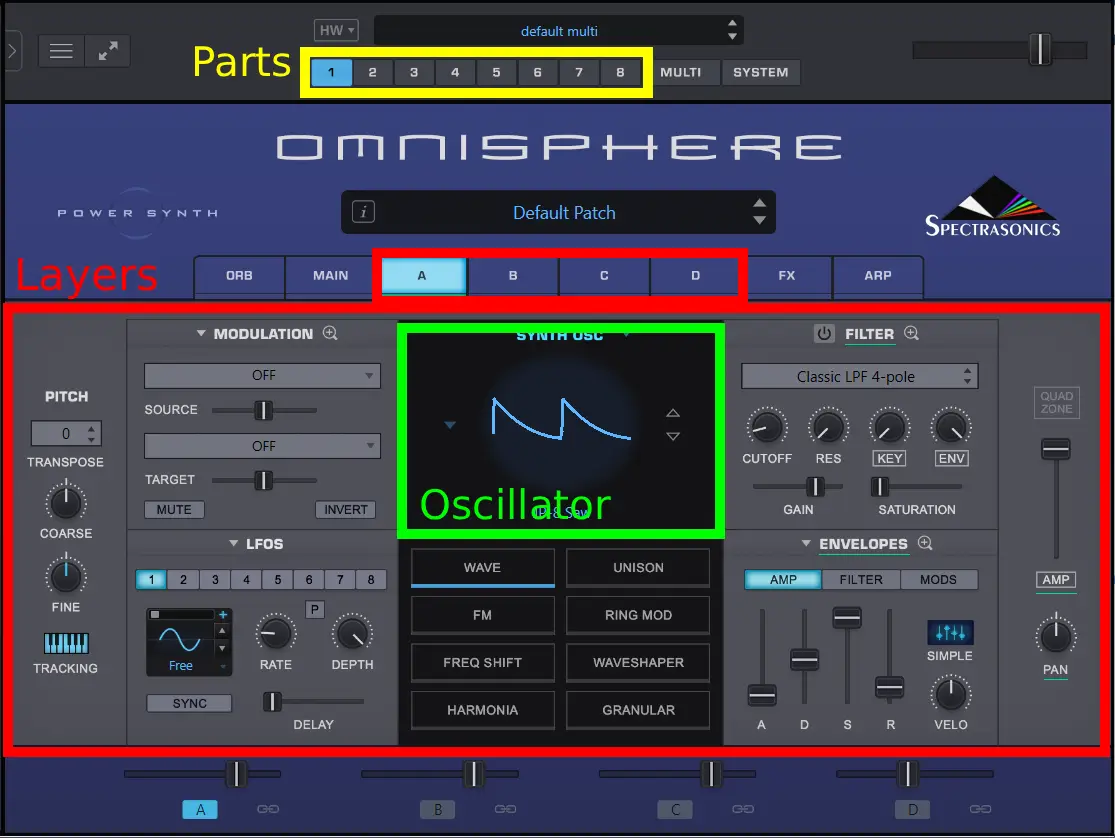
- Omnisphere is split into different sections called Multi’s, Parts, Layers and Oscillators.
- The Multi contains Parts and Parts consist of Layers which contain the Oscillators.
- Oscillators can be either by sample based or sound wave generators.
- Four Layers can make a Part and eight Parts make up a Multi.
- Each Layer consists of its own oscillator and filter etc
With this basic knowledge you can work with Omnisphere to create “patches” that you can load into any of the eight Parts. Patches just save the settings of the four Layers that make up Parts.
Loading presets
As the synth is separated into Multi’s and Parts. You can save and load presets for each one. The preset browser looks the same for both so ill just cover Parts here.
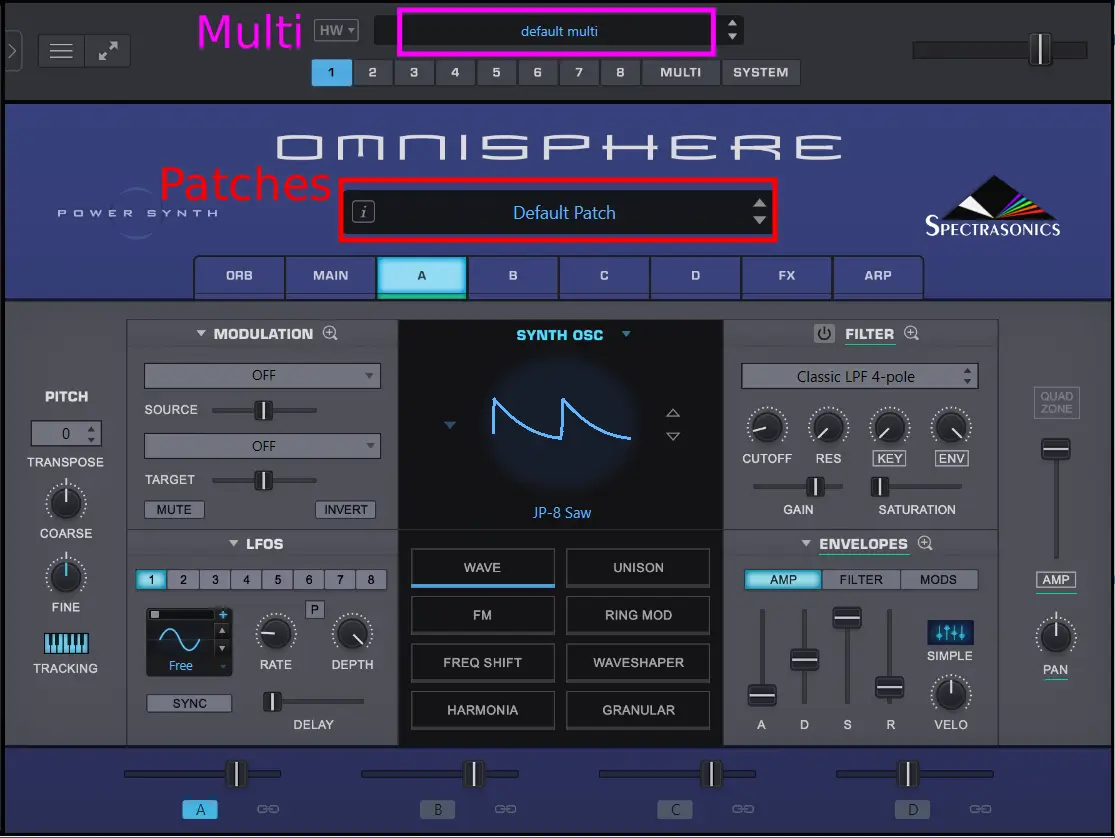
Clicking on the long black box (labeled as Patches or Multi in the diagram) loads the preset browser.
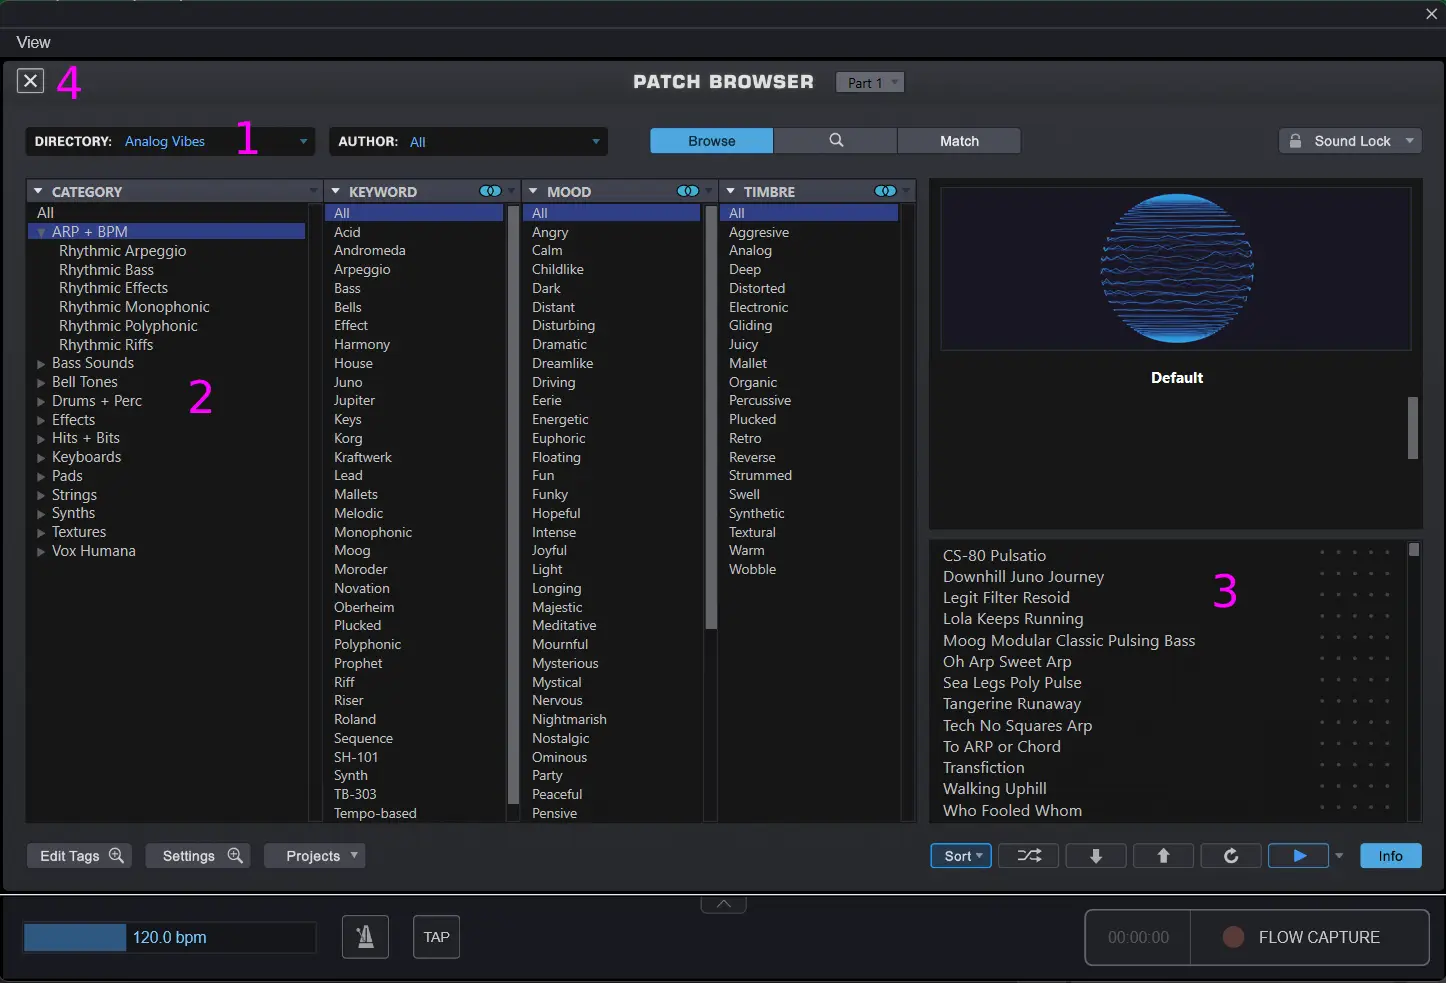
To keep it simple there are four steps to loading a preset.
- Select the directory
- Select a category
- Select the preset
- Close the browser
A Directory is a group of presets. The category selection filters the presets from the selected directory so you can find something that fits what you have selected.
Note that when you click on a preset (step three) the synth will make a sound so you can hear what the preset sounds like. You can also click the triangle play button in the bottom right corner to play the preview again.
Saving presets
When saving a preset, choose the preset type that best applies. For example if you’ve only edited the four Layers of a Part then saving it as patch is probably a good idea as you could then load the patch into a different Part to create a Multi later on.
If you have edited multiple Parts then saving the preset as a Multi is the best option so you don’t lose any changes to the other edited Parts.
To save a preset
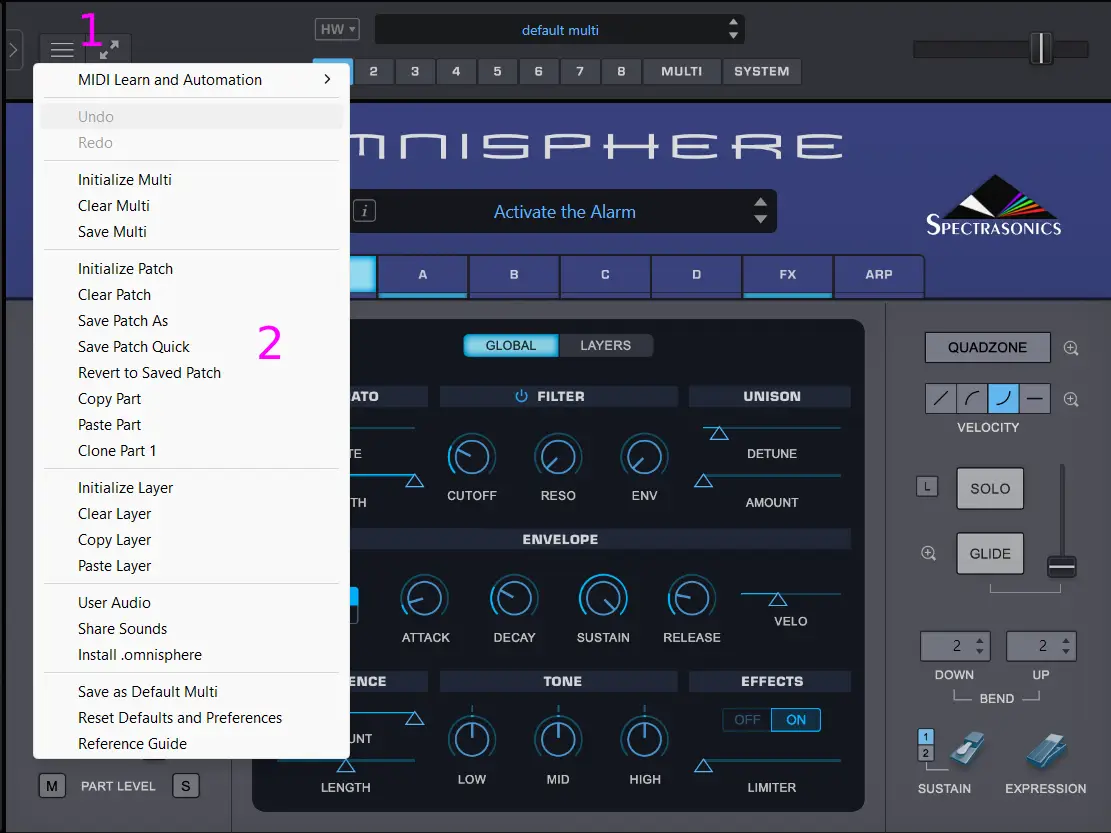
- Click the utility menu
- Click either “Save Patch As” or “Save Multi”
- Type in the name
- Select or create a category folder inside the user folder and click save
- Assign tags and keywords that apply to the preset to make browsing for it easier
Creating categories
Presets and categories are managed by the operating systems file manager and are just folders. When saving a preset you can actually create as many folders as you like inside the main user folder and these become categories to use when saving presets. The default one is “My Category” and you would have noticed you had to select a category before being able to progress any further.
The default save location for Patches:
/STEAM/Omnisphere/Settings Library/Patches/User
The default save location for Multis:
/STEAM/Omnisphere/Settings Library/Multis/User
Assigning tags and attributes
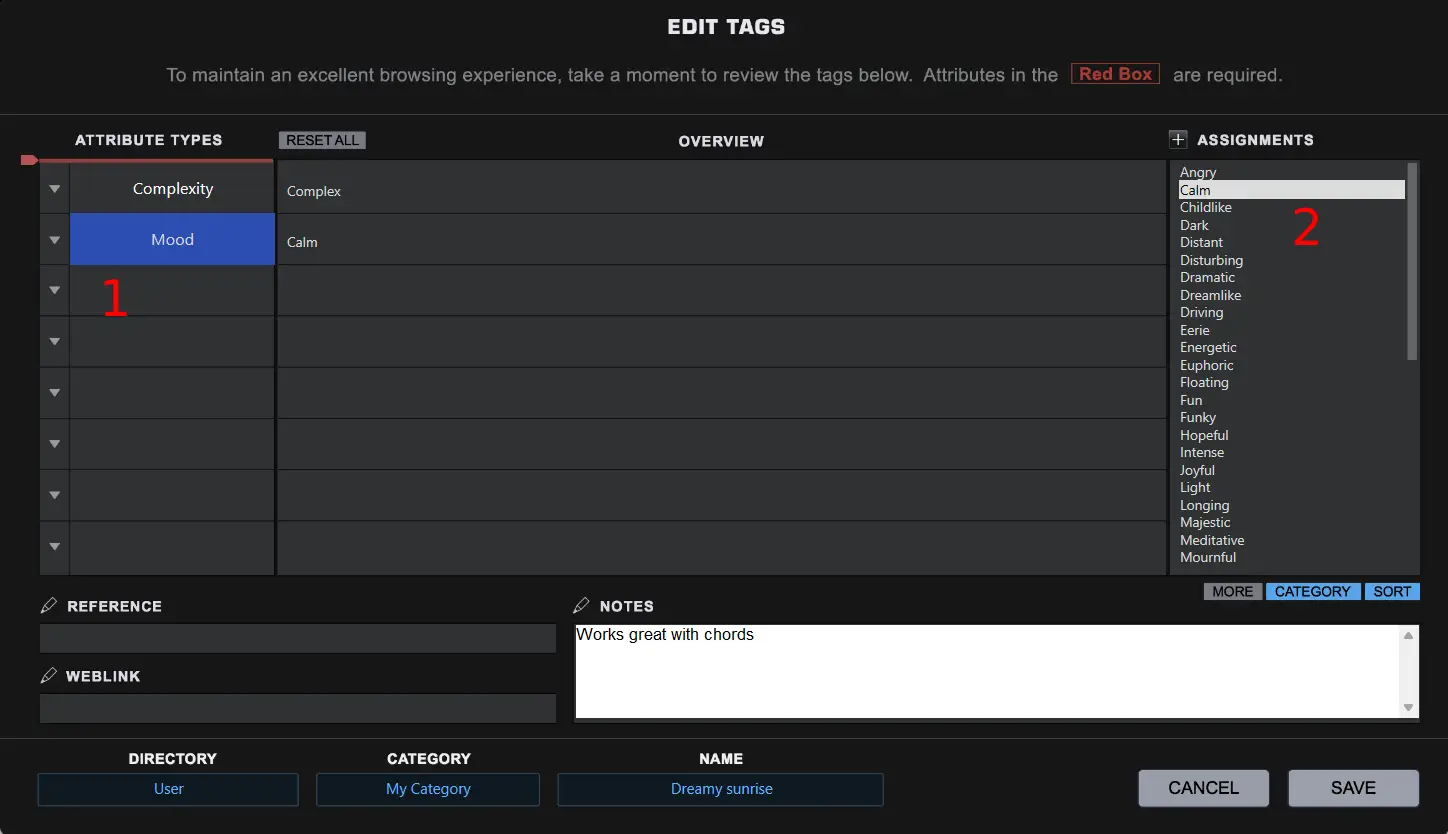
- Click the dropdown arrow and select or create an attribute
- Select or create the assignment that suits the attribute you added
Repeat those steps until you have added what you want. This makes it easier to find presets in the browser later!
Lastly, add any notes. I use this to describe if it works well with chords for example.
Next time...
That should (with any luck) have summed up the basics of how to get started with Omnisphere. Next time I’ll look at some fun stuff like oscillators and editing sounds!